 how-to
How to Check Honda Civic Ball Joints for Play
Last Updated: October 28, 2026
Quick Summary
To check Honda Civic ball joints for play, safely lift and support the front of the car, remove the wheel, then rock the tire top-to-bottom and side-to-side. A clunk, gap, or visible movement at the joint means the ball joints are likely worn and need inspection.
- Support the car on jack stands rated for the load, never on the jack alone.
- Check vertical movement by pushing the tire top in and pulling the bottom out.
- Check horizontal movement at the 3 and 9 o'clock positions and compare left and right sides.
- A torn dust boot accelerates wear, so inspect it along with any play.
- Plan an alignment after replacing a ball joint to avoid new tire wear.
Table of Contents
- Symptoms of a Worn Honda Civic Lower Ball Joint
- Tools and Safety Steps Before You Start
- How to Check Honda Civic Ball Joints for Play
- Ball Joint Inspection with a Pry Bar
- How Much Ball Joint Play Is Acceptable
- How Long Honda Civic Ball Joints Last and When to Replace Them
- Booking a Ball Joint Inspection at Speedy Roo Motorsports
- Frequently Asked Questions
Worn ball joints are one of the quieter ways a Honda Civic can get unsafe.
This guide walks you through how to check Honda Civic ball joints for play at home, what the results mean, and when to stop and bring the car in.
What "play" actually means: Play is movement in a part that should be tight. A healthy ball joint has almost none.
Here is why this matters:
- The wheel can move out of alignment while you drive
- Tire wear becomes uneven and faster
- Steering response gets vague
Because the stakes are high, treat any noticeable play as a reason to inspect the joint closely, not a minor cosmetic issue.
Symptoms of a Worn Honda Civic Lower Ball Joint
Most worn lower ball joints announce themselves before they fail. The most common sign is a clunk or knock when you hit bumps, pull into a driveway, or brake hard.
Watch for these signs:
- Clunking or popping noises over bumps
- Steering that feels loose or wanders
- Uneven or rapid tire wear on the front tires
Keep in mind that several other front-end parts can make similar noises. Worn tie-rod ends, sway bar links, and wheel bearings can all clunk or rattle. That is why a hands-on check, covered below, matters more than guessing from the sound alone.
Tools and Safety Steps Before You Start
Before you touch the car, gather the right tools and set up safely. Rushing this step is how people get hurt.
Tools you will need:
- A floor jack rated for your vehicle's weight
- Two jack stands rated for the load
- Wheel chocks
Safety steps:
- Park on flat, level ground and set the parking brake.
- Chock the rear wheels.
- Loosen the front lug nuts slightly before lifting the car.
- Lift the front of the car at the proper jacking point.
- Place jack stands under the frame or the manufacturer's support points. Never rely on the jack alone.
- Lower the car onto the stands and confirm it is stable before you get underneath.
Never work under a vehicle supported only by a jack. Also, check your owner's manual for the exact lift and support points for your Civic's model year, since they can vary between generations.
How to Check Honda Civic Ball Joints for Play
Check each front wheel separately. Work through the steps in order so you do not miss anything.
- Lift the front of the car and place it on jack stands, as described above.
- Remove the wheel for the most accurate check. You can also do a basic check with the wheel on, but removal lets you see the joint clearly.
- Make sure the suspension is unloaded so it hangs freely. This means the wheel is off the ground or the car is supported so the control arm is not bearing weight.
- Grab the tire at the top and bottom, then rock it in and out.
- Repeat the same check at the 3 and 9 o'clock positions, pushing and pulling.
If you feel clicking, looseness, or movement at the joint itself, the ball joint is likely worn.
Testing for Vertical Movement
Vertical movement tests whether the joint lets the wheel hub move up and down more than it should.
- Place one hand at the top of the tire and one at the bottom.
- Push the top inward and pull the bottom outward, then reverse the motion.
- Watch and feel the joint. A little movement is normal, but a clunk or a noticeable gap is not.
Common mistake: Confusing wheel bearing play with ball joint play. A wheel bearing usually shows movement that changes when you spin the wheel. Keep this in mind as you test.
Testing for Horizontal Movement
Horizontal movement checks side-to-side play at the wheel.
- Hold the tire at the 3 and 9 o'clock positions.
- Push inward at one side and pull outward at the other, then switch.
- Note any clunk, shift, or looseness in the joint.
Compare the left and right sides. If one side moves noticeably more than the other, that side needs a closer look.
The core checks come down to a few steps, summarised below so you can scan them quickly.
| Check | How to do it | What it means |
|---|---|---|
| Vertical movement | Push top in, pull bottom out, then reverse | Clunk or gap suggests worn joint |
| Horizontal movement | Push and pull at 3 and 9 o'clock | Compare left and right sides |
| Pry bar test | Lever between control arm and knuckle | Stud movement points to ball joint |
| Wheel bearing check | Spin the wheel and watch for change | Movement that changes with rotation is bearing play |
| Boot condition | Inspect the dust boot | A torn boot accelerates wear |
Ball Joint Inspection with a Pry Bar
A pry bar can be used to check for movement. Pry at the right point, with the suspension in the right state, and isolate what you see.
Set up the pry correctly
- Raise and support the front of the car on jack stands so the suspension hangs at full droop (unloaded). This is the position where lower ball-joint play is easiest to see on most Civic generations.
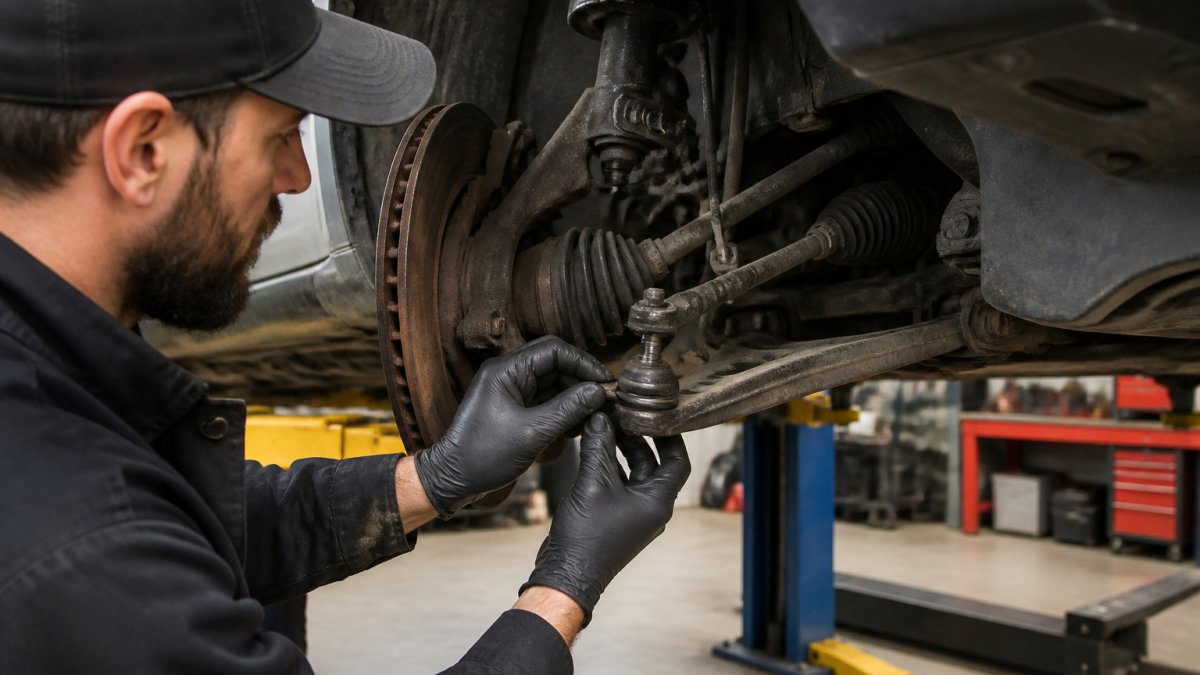
- Remove the wheel so you have a clear line of sight to the lower ball joint where the stud passes through the steering knuckle.
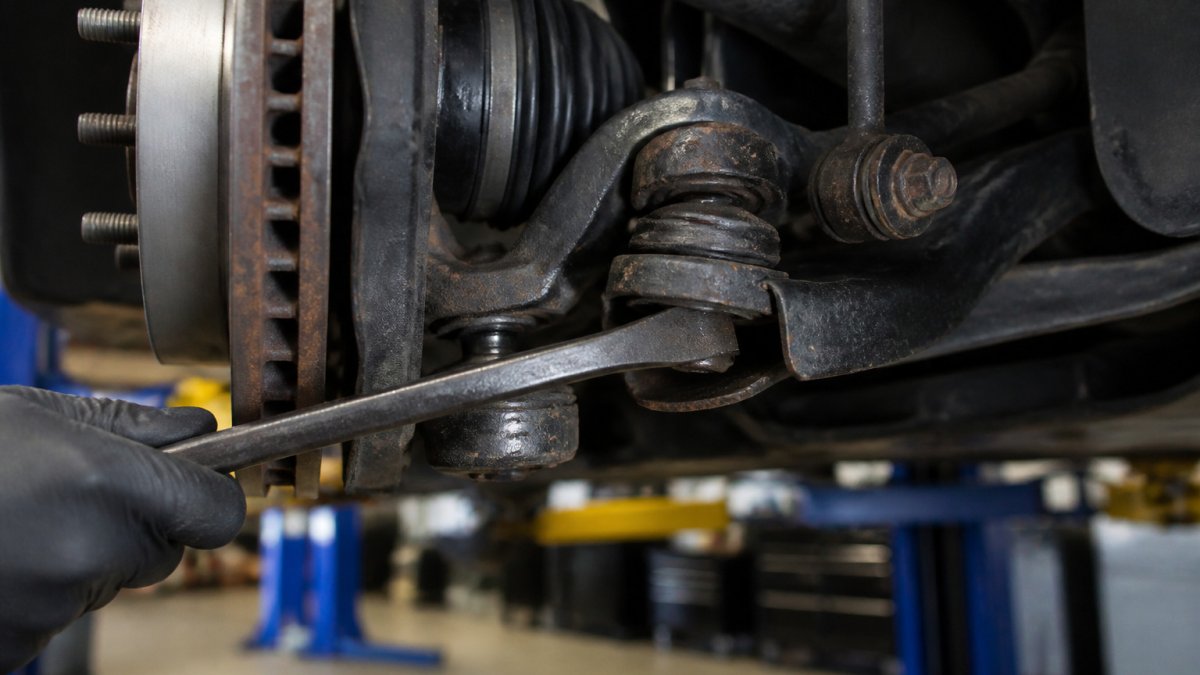
- Place the pry bar between the lower control arm and the steering knuckle, as close to the ball joint as you can get without touching the boot, the brake hose, the axle boot, or the tie rod.
- Lever gently up and down and watch the joint, not the whole suspension. You are looking for relative movement between the ball stud and its socket housing.
Use light, controlled pressure. The goal is to reveal movement, not to force parts apart or tear a healthy boot.
Read the movement correctly
- Vertical movement at the joint (stud moving in and out of the socket) points to a worn lower ball joint.
- Side-to-side movement at the knuckle with the joint itself staying tight points toward a tie-rod end.
- Movement that appears only when the wheel is spun, or that changes with rotation, points toward a wheel bearing.
A torn or cracked dust boot is a warning sign even before play appears. Once the boot is compromised, grit and water get into the socket and wear accelerates. Clean the area first so you can tell fresh grease seepage from old road grime.
Civic-specific pry points by generation
The lower ball joint design and the clearance around it vary by Civic generation, so the pry point that works on one car may not work on another. As a general pattern:
- Older Civics with a pressed-in lower ball joint in the control arm give you more room to pry between the arm and the knuckle, but the joint is often rusted in place, so inspect for cracks around the press fit as well as play.
- Later Civics with a bolt-in lower ball joint are easier to inspect because the joint housing is visible; look for movement between the housing and the knuckle as well as between the stud and the housing.
- Civics with a MacPherson-strut front suspension load the lower ball joint differently than older double-wishbone cars, so the unloaded check is the reliable one; a loaded check can mask play.
If you are unsure which layout your car has, check the undercarriage before you start prying. The joint that carries the knuckle is the one to test.
Isolate before you condemn
Before you decide the ball joint is bad, repeat the pry test with a helper watching the tie rod and the wheel bearing area. If the knuckle moves but the ball stud does not, the play is coming from somewhere else.
How Much Ball Joint Play Is Acceptable
A healthy Honda Civic lower ball joint should have essentially no perceptible play. Honda's service information specifies a maximum allowable play measured at the joint with a dial indicator, and the exact figure and measurement point vary by model year and suspension design. Because those numbers are year-specific, verify them against the service information for your Civic's generation before you condemn or clear a joint.
Where the measurement is taken
The measurement is taken at the ball stud relative to the joint housing, with the suspension unloaded and the wheel removed so the indicator can be set up squarely. A magnetic-base dial indicator is fixtured to the control arm or knuckle, and the plunger is placed against the stud or the knuckle near the joint. The suspension is then worked gently by hand or with a pry bar, and the indicator shows the actual movement in thousandths of an inch.
Practical decision rules
- No visible or felt movement, boot intact: the joint is serviceable; recheck at your next oil change or tire rotation.
- Any repeatable movement you can see or feel at the joint: treat it as worn. Even small play grows quickly once the boot is compromised.
- Movement plus a torn boot: plan for replacement rather than waiting for a noise.
If you do not own a dial indicator, the hand-rock and pry-bar checks are still valid screening tools. What you cannot do at home is certify a joint as within spec by feel alone. When the result is borderline, have a shop measure it. ::: Precision in these measurements ensures vehicle safety, much like the necessity to check tyre tread to maintain proper road contact and handling.
Why the number matters less than the trend
Record what you find, note the date and mileage, and compare at the next inspection.
What to do after you find play
If your check shows play, limit driving until it is repaired. Avoid hard braking, potholes, and high-speed driving, and have the joint inspected professionally if you are not equipped to replace it. After replacement, plan on an alignment, since disturbing the suspension changes the front-end geometry. Recheck the new joint after the first few hundred miles to confirm the hardware has stayed tight.
How Long Honda Civic Ball Joints Last and When to Replace Them
Ball joint life depends on driving conditions, road quality, and how the car is maintained. Many owners find that joints last a long time on smooth roads and wear faster on rough pavement, potholes, and salted winter roads.
Replace the ball joint when:
- You feel or see movement during the inspection
- You hear persistent clunking over bumps
- The dust boot is torn and the joint shows play
Replacing a ball joint without a proper alignment can cause new tire wear, so plan to have the car aligned after the repair.
Booking a Ball Joint Inspection at Speedy Roo Motorsports
If you are not comfortable lifting the car or you found play during your check, a professional inspection is the safest next step. Speedy Roo Motorsports specializes in maintenance and repair for Japanese automobiles.
For a worn or loose joint, do not keep driving on it for long. If you notice shaking or a steering issue, learn what car shaking can mean for your safety and next steps. You can also read our overview of common Honda Civic suspension problems to see what else can cause similar symptoms.
When you are ready to fix it, contact our Aurora shop. You can review our Toyota suspension repair service in Aurora to see what the repair involves. Planning ahead also helps with budgeting, so our Honda Civic maintenance cost guide over five years can help you think through upcoming repairs.
Frequently Asked Questions
How do you tell if a ball joint has play?
Safely raise the front of the Civic and support it on jack stands. Grip the tire at the top and bottom and rock it in and out, then check for vertical movement by pulling and pushing at the 12 and 6 o'clock positions. Any clunk, visible gap at the joint, or movement you can feel in the ball joint itself points to wear. Movement in the wheel hub or bearing can feel similar, so confirm the source before replacing parts.
How much ball joint play is acceptable on a Honda Civic?
Because exact limits vary by generation, check the service manual for your model year. If the joint shows visible looseness or clunks when you load and unload the suspension, have it inspected promptly rather than waiting for a specific measurement.
Can you drive a Honda Civic with a loose ball joint?
Driving with a badly worn ball joint is risky because a failed joint can separate the wheel from the suspension. Early wear may only cause noise over bumps and uneven tire wear, but any clunking, steering wobble, or visible looseness should be checked before you continue driving. Have it inspected soon, and avoid hard braking or rough roads until the vehicle is evaluated.