 how-to
Lexus Oil Change: Step by Step Guide for 2026
Table of Contents
- What You'll Need Before You Start Your Lexus Oil Change
- Lexus Oil Change Interval: When Your Engine Actually Needs Fresh Oil
- Step 1: Safely Lift and Secure Your Lexus
- Step 2: Drain the Old Oil
- Step 3: Replace the Oil Filter
- Lexus Oil Filter Wrench Size and Filter Types
- Step 4: Add New Oil and Check the Level
- How to Reset the Lexus Maintenance Light
- Frequently Asked Questions
Last Updated: September 10, 2026
What You'll Need Before You Start Your Lexus Oil Change
A step by step guide to Lexus oil change starts with the right supplies, because a missing crush washer or the wrong filter wrench will stall the job before the drain plug ever comes loose. This guide from Speedy Roo Motorsports covers everything an owner needs to complete the work at home, from the tools list to resetting the service light.
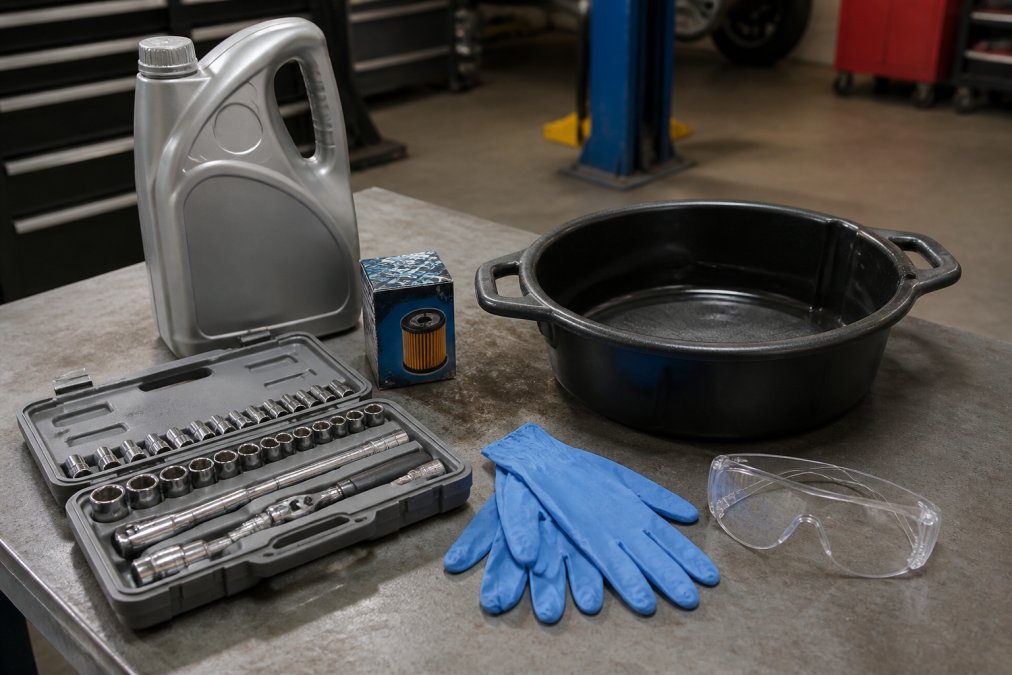
Gather these items before you raise the car:
- New oil in the correct viscosity grade, typically 0W-20 for most recent Lexus models
- A new oil filter and a fresh crush washer for the drain plug
- A socket set with the correct drain plug size for your model
- An oil filter wrench that matches your filter housing
- A drain pan rated for at least 6 quarts, plus a funnel
- Jack stands or ramps, wheel chocks, and safety goggles
- Nitrile gloves and a torque wrench for the final tighten
Check your owner's manual or service manual for the exact oil capacity and torque specifications for your model year.
Lexus Oil Change Interval: When Your Engine Actually Needs Fresh Oil
Most Lexus models call for an oil and filter change every 5,000 to 10,000 miles, depending on oil type and driving conditions (lexus.com). Toyota and Lexus generally specify 10,000-mile intervals for full synthetic oil under normal conditions, but that number drops sharply for severe service (toyota.com).
Severe service covers more than most drivers expect:
- Frequent short trips under 5 miles
- Stop-and-go commuting
- Extreme cold or heavy dust
- Towing or hauling
- Extended idling
If your daily commute in the Denver metro area is mostly short hops, treat your car as severe service and shorten the maintenance interval to roughly 5,000 miles. Staying ahead of the schedule protects your warranty compliance and prevents oil sludge from building up in the engine.
Step 1: Safely Lift and Secure Your Lexus
Safety comes first, and this is where home oil changes go wrong most often. Park on a level, hard surface, set the parking brake, and chock the rear wheels before lifting anything.
Raise the front of the vehicle with a floor jack at the manufacturer's designated lift points, then lower it onto jack stands rated for the car's weight. Never work under a vehicle held up by a jack alone. A hydraulic lift makes the job faster, but jack stands are the standard for a home garage.
Wear safety goggles and gloves for the entire job. Used oil is a skin irritant, and hot components will burn you.
Expected result: The front end is stable, the drain plug is accessible, and the car will not move while you work underneath.
Step 2: Drain the Old Oil
Warm the engine for two to three minutes first, then shut it off. Warm oil flows faster and carries more suspended contaminants out with it. Let it cool just enough that the oil pan and drain plug are safe to touch.
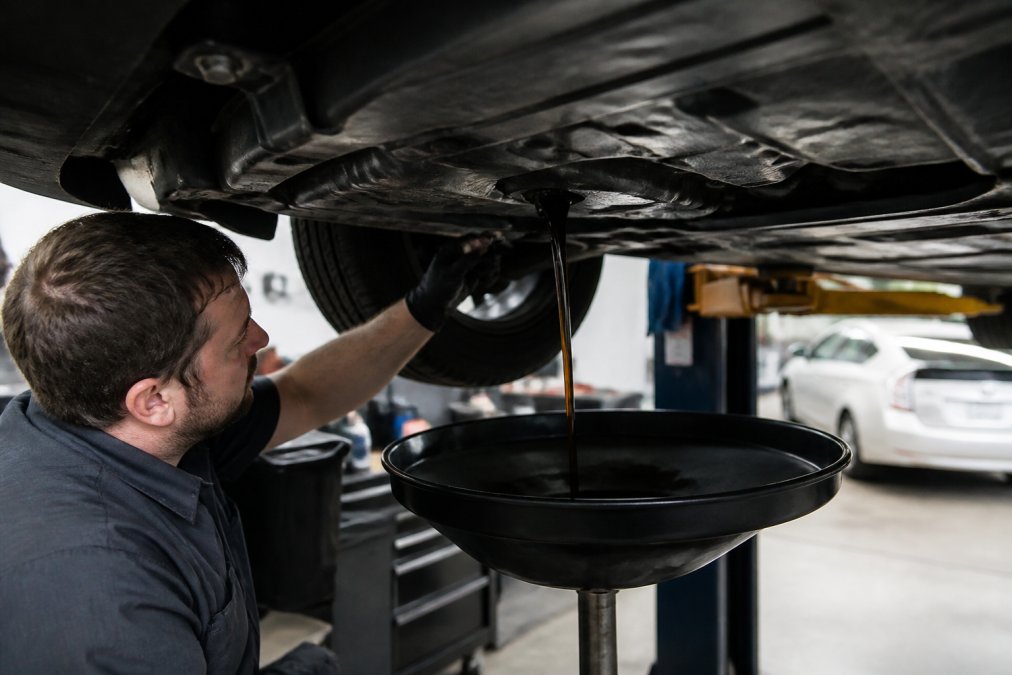
Position the drain pan directly under the drain plug. Loosen the plug with a socket wrench, then remove it by hand and move your arm clear as the oil rushes out. Let it drain for several minutes until the flow slows to a drip.
Inspect the old crush washer while you wait. If it is flattened or cracked, replace it. Reusing a worn washer is a leading cause of slow drips from the oil pan.
Step 3: Replace the Oil Filter
Lexus has used two filter architectures over the past two decades, and the procedure differs enough that you need to identify yours before you start. Getting this wrong is the single most common reason a home oil change stalls halfway through.
Spin-on canister filters appear on older V6 and V8 engines (many 2GR-FE, 1UR-FE, and 3UR-FE applications). They thread directly onto a machined boss on the block. Removal is straightforward with a 64mm or 65mm, 14-flute cup wrench or a strap wrench.
Cartridge filters inside a plastic housing appear on most current four-cylinder and V6 Lexus engines (2AR-FE, 2GR-FKS, A25A-FKS, and similar). The housing is a black or gray plastic cap with a large hex on top, commonly 64mm with 14 flats, though some housings use a 65mm or a Toyota-specific 6-point tool. The filter element sits inside, and you replace only the element and its o-rings, not the housing.
luxury car protection.Removing a spin-on filter
- Slide the drain pan under the filter. Expect a steady stream of oil when the seal breaks.
- Fit the cup wrench onto the end of the canister and break it loose counterclockwise. If it will not budge, drive a long screwdriver through the canister body near the base and use the handle as a lever, messy, but effective.
- Spin the filter off by hand once it is loose.
- Wipe the mounting boss clean with a lint-free rag. Inspect the old gasket, if it stayed stuck to the block, peel it off before installing the new filter, or you will have a double-gasket leak.
Removing a cartridge housing
- Position the drain pan under the housing. Most Lexus housings have a small drain plug on the bottom of the cap, remove it first with a hex key to drain the housing before you unscrew the cap. Skipping this step dumps a half-quart of hot oil down your arm.
- Fit the correct cap wrench onto the hex and turn counterclockwise. Plastic housings crack if you use a wrench that does not seat fully, so confirm the fit before applying force.
- Lift the cap and element out together. Pull the old element off the center tube and set it aside for disposal.
- Remove the large o-ring from the cap groove and the small o-ring from the center tube or cap stem. Both come with the new filter kit.
Installing the new filter
- Spin-on: Lubricate the new gasket with a thin film of fresh oil, wipe the mounting boss once more, then thread the filter on by hand until the gasket contacts the block. Tighten an additional three-quarters of a turn by hand. Do not use a wrench, over-tightening crushes the gasket and can distort the canister.
- Cartridge: Coat both new o-rings with fresh oil and seat them in their grooves. Snap the new element onto the center tube, insert it into the housing, and thread the cap on by hand. Tighten to the torque spec in your service manual, most Lexus cartridge housings call for roughly 18 to 25 lb-ft, but confirm the exact figure for your engine. A torque wrench here prevents the cracked-housing failure that sends owners to the dealer.
Expected result: The new filter is seated, the o-rings are lubricated and in place, and the housing or canister is tightened to spec with no residual oil weeping from the seal.
Lexus Oil Filter Wrench Size and Filter Types
Most generic guides tell you to "use the correct filter wrench" and stop there. That is the gap this section fills: the actual wrench sizes and filter styles by engine family, so you can buy the right tool before the car is on jack stands.
Wrench size by housing style
| Housing style | Typical engine families | Wrench size | Notes |
|---|---|---|---|
| Spin-on canister | 2GR-FE, 1UR-FE, 3UR-FE, older 1MZ-FE | 64mm or 65mm, 14-flute cup wrench | Also works with a strap wrench or adjustable pliers in a pinch |
| Plastic cartridge cap | 2AR-FE, 2GR-FKS, A25A-FKS, 2GR-FXS | 64mm, 14-flute cap wrench (some 65mm) | Confirm the flat count, a 6-point Toyota-specific tool is required on a few housings |
| Metal cartridge cap | Certain 1UR and 2UR applications | 65mm, 14-flute | Less common; verify in the service manual |
Two cautions. First, a 64mm wrench that fits one Lexus housing may not fit another, the flat count and depth differ. Second, plastic housings crack when a poorly seated wrench slips, so test-fit the tool on the cap before you apply torque.
OEM vs. aftermarket filters
The deciding factor is specification, not brand loyalty. A quality aftermarket filter that meets or exceeds the factory spec performs fine. A cheap filter with a weak anti-drainback valve does not, and it can cause a dry start on cold mornings.
| Filter type | Best for | Key trade-off |
|---|---|---|
| OEM filter | Warranty compliance and factory fit | Higher cost, dealer-only source |
| Quality aftermarket filter | DIY owners wanting equivalent filtration | Must match the correct part number |
| Budget aftermarket filter | Short-interval changes only | Weaker anti-drainback valve, inconsistent media |
For cartridge-style housings, the filter kit should include the element, the large cap o-ring, and the small center-tube o-ring. If a kit ships without both o-rings, buy them separately, reusing a hardened o-ring is a guaranteed leak.
Lexus owner's manual portal for confirming filter part numbers and torque specs by VIN
Step 4: Add New Oil and Check the Level
Reinstall the drain plug with a new crush washer and tighten it to the torque specification in your service manual. Do not guess on torque. Too loose leaks; too tight strips the oil pan threads.
Pour in most of the recommended oil capacity through a funnel, then wait a minute for it to settle into the oil pan. Start the engine and let it idle for about 30 seconds while you watch for leaks at the plug and filter. The service light may stay on until you reset it.
Shut the engine off, wait a few minutes, then pull the dipstick, wipe it clean, reinsert it, and read the level. Add oil in small increments until the level sits between the low and full marks. Overfilling is as harmful as underfilling. Check the dipstick again after your first drive.
How to Reset the Lexus Maintenance Light
Resetting the maintenance light takes about a minute and clears the service reminder after your oil change. The exact procedure varies by model, but most Lexus vehicles use one of two methods.
Method one (most models): With the engine off, press and hold the trip meter reset button. Turn the ignition to ON while holding it, keep holding for about five seconds, then release. The maintenance light should flash and go out.
Method two (models with a multi-information display): Use the steering wheel controls to open Settings, then Maintenance, then Oil Maintenance, and select Reset. Confirm the reset on screen.
If the light stays on, repeat the sequence and hold the button slightly longer. When the procedure will not clear the reminder, the system may need a scan tool to complete the reset.
A DIY Lexus oil change is a straightforward job until a stripped drain plug, a stuck filter housing, or a maintenance light that will not clear turns a one-hour task into a weekend problem. Speedy Roo Motorsports has handled maintenance and repair for Japanese automobiles since 2002, with technicians experienced across many Lexus models, transparent communication, and the diagnostic equipment to sort out the issues a home garage cannot. If you would rather hand off the work, or you want your service records kept straight for warranty compliance, get started with Speedy Roo Motorsports and keep your Lexus running the way it should.
Frequently Asked Questions
Can you do your own oil change on a Lexus?
Yes. Most Lexus models are straightforward for a DIY Lexus oil change. You'll need a floor jack, jack stands, a socket set, a drain pan, and the correct oil filter wrench for your model. The job takes about 45 to 60 minutes. The main differences from other cars are the underbody panels on some models and the cartridge-style filter on newer engines. Check your owner's manual for oil capacity and torque specs first.
Does changing my own oil void my Lexus warranty?
No. Federal law protects your right to perform your own maintenance without voiding your warranty, as long as you use oil that meets Lexus specifications and follow the recommended Lexus oil change interval. Keep receipts for the oil and filter you buy, and log the date and mileage of each change. If a warranty claim ever comes up, that documentation shows you maintained the vehicle properly.
What type of synthetic oil is recommended for Lexus engines?
Most modern Lexus engines specify 0W-20 full synthetic motor oil, though some older or performance models call for 5W-20 or 5W-30. Always check your owner's manual or the oil cap for the exact viscosity grade. Full synthetic oil handles heat better and resists sludge formation longer than conventional oil, which matters for the longer service intervals Lexus recommends on newer models.
How do I reset the maintenance light after an oil change?
On most Lexus models, turn the ignition to ON without starting the engine. Use the trip or odometer button to cycle to the maintenance screen, then press and hold the same button until the light flashes and resets. Some models require the procedure through the infotainment menu instead. If yours won't reset, a quick scan tool or a visit to a shop can clear it in minutes.